Many designers jump straight to colors when brainstorming cycling jersey design ideas. In my experience overseeing activewear production, that guarantees a kit that fails on the tarmac.
This workflow bridges vague inspiration and a manufacturable garment. You will learn to create a distinctive jersey that is readable at speed and comfortable. You can draft a concept today, though physical sampling takes longer.
We tackle fit first, then graphics, then production files. I will show you how colors render differently on Lycra versus mesh. We examine fabrics in direct sunlight and balance aesthetics with ISO high-visibility clothing standards.
This process prevents errors whether you outfit a club, team, or private-label brand.
Author’s Verdict: Design is engineering. Prioritize base materials and safety elements before placing a single logo.
What You Need Before You Start
In our experience working with top cycling apparel manufacturers, missing files cause most production delays. Treat this make-or-break checklist as your foundation.
-
Project Scope: Map out rider type, climate, terrain, budget, quantity, size range, brand colors, and delivery date. Review a sportswear fabrics guide to select the correct moisture-wicking fabric.
-
Design Tools: Use Adobe Illustrator for final production art. Figma or Canva work well for early cycling jersey design ideas, but you must rebuild them cleanly before printing.
-
Factory Template: Request the exact cut-and-sew template from your supplier. Never guess panel shapes.
-
Asset Files: Export logos in vector format (.ai, .eps, .pdf) .Save all logos as vector files. Export them in Adobe Illustrator as EPS or PDF. Keep your raster images at 300 DPI. Convert all colors to the CMYK profile for printing.
🧠 Expert Take: We asked a professional sportswear designer about color matching. They warned that identical brand colors shift drastically between shiny Lycra and porous mesh panels. Always demand a physical color swatch test.
⚠️ Safety First: Protect your delivery timeline. Budget 4 to 6 weeks for concepting, revisions, digital proofing, and at least one physical sample round.
Step 1: Define the Use Case and Design Brief
Last year, a local club printed a flat design. The logos warped around the riders’ chests. We fixed this by adjusting the side panels. Always map your graphics to the physical body.
Choose your primary use case. Select road race, club ride, gravel event, MTB trail riding, charity event, or boutique retail drop.
Map your physical context variables. Document expected speed, riding position, weather, and sweat volume. Establish baseline UPF sun protection standards and note any mud, dust, or dawn/dusk visibility needs.
Account for fabric stretch. A race fit feels highly compressive, pulling graphics flush against the skin. A club or MTB fit hangs looser, shifting dynamically as you move on the bike. The exact same vector file distorts differently across a tight aero cut versus a relaxed trail pattern.
Define the jersey’s main job in one sentence. Write a core goal, such as “Be instantly recognizable for our club,” or “Feel premium for a small brand launch.”
Filter this goal through your audience. Club organizers must design for broad member buy-in. Apparel founders must prioritize manufacturing repeatability and SKU simplicity. Individual cyclists can optimize strictly for personal taste using this exact same template.
Draft three to four early design directions. Describe each cue using geometric patterns and textures rather than relying solely on color labels. This ensures visual accessibility.
Run a formal poll with your teammates or customers before finalizing the art.
Review your document. You should see a complete one-paragraph design brief. It must cover exactly who the kit is for, where they will ride it, and the exact visual impression you want to deliver on the road.
⚠️ Experience Warning: Do not skip the audience vote. I have watched boutique apparel founders order 200 fully custom pieces based purely on personal taste. They frequently experience zero retail sales because they ignored customer buy-in during the concept phase.
Actionable Insight: Print your design brief and pin it next to your monitor. This anchors your core use case and prevents scope creep when browsing complex graphic ideas online.
Step 2: Establish Fit Class and Fabric Architecture
I test every Lycra blend on our Juki machines. Stiff fabrics break the needles. High-stretch fabrics warp the printed logos. You must pick the right fabric before you design.
-
Select your fit class. Choose a relaxed/club, race, pro/aero, or loose MTB cut.
-
Acknowledge the practical tradeoff. Tighter fits improve aerodynamics and lock logos securely against the body. Looser cuts change how graphics drape and read from a distance. While this logic targets road kits, MTB or casual club jerseys require different priorities, like abrasion resistance and a relaxed drape.
-
Map your fabric zones. Identify the body fabric, side mesh panels, sleeve grippers, collar, and pocket area. Use our sportswear fabrics guide to assign specific materials to each zone.
-
Set special requirements. Note your non-negotiables now. Specify UV protection, hot-weather breathability, cold-weather layering, or dark trail-friendly colors. Always mandate high-quality moisture-wicking fabric for your primary body panels.
-
Map the physical boundaries. Treat seams, zippers, pocket edges, and panel breaks as hard design constraints, not afterthoughts. Visualize your garment construction design as a strict grid. These rigid breaks will slice directly through continuous graphics.
-
Account for fabric stretch and texture. Stretched fabric alters how line weights appear when worn. Smooth Lycra looks highly dense and renders colors vibrantly. Ventilated mesh looks noticeably more open and airy. A solid color block may look completely uniform on your screen, but on physical mesh, it will appear slightly lighter and less saturated.
-
Verify your canvas. Stop here. You must be able to name your chosen fit, exact fabric mix, and non-negotiable performance features before moving to the artwork phase.
🧠 Expert Take: I always warn private-label clients about color shifting across mixed fabrics. A specific brand red looks deep on smooth Lycra but washes out on porous side mesh. Always request a physical fabric strike-off to verify color saturation.
⚡ Power Move: Build a distinct 1-inch safe zone around all zippers and pocket edges. Keeping critical text away from these boundaries prevents awkward logo cut-offs during the final sewing process.
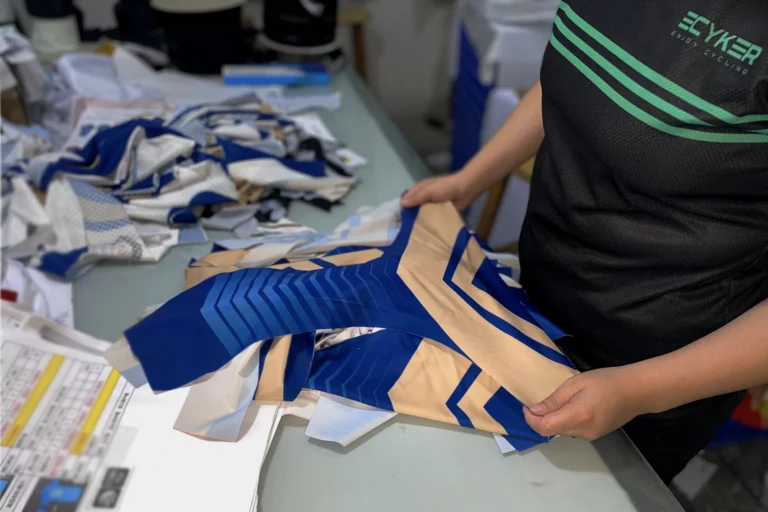
Step 3: Develop the Visual Concept and Typography
![]()
In our tests, stacking multiple themes onto one garment guarantees visual failure. From 20 meters away, a busy design becomes a muddy blur. Translate your inspiration into one dominant visual story.
Select a single design foundation. Choose from minimalist cycling jersey styles, a retro cycling jersey design, geometric bike apparel art, bold cycling team colors, mountain bike jersey aesthetics, or sponsor-led professional cycling kit trends.
Solve the “too busy versus too minimal” trap. Assign exactly one hero detail and one personalized detail. Keep in mind that minimalist private-label brands use subtler graphics, while clubs rely on bold, full-custom sublimated art.
Visualize the rider bent over the handlebars. This aggressive riding position hides the front torso and drastically stretches the lower back. Evaluate the jersey from 10 to 20 meters away. Rely on high-contrast shapes and bold panel placements rather than slight color shifts. Pair dark geometric blocks against light backgrounds so the design remains accessible to viewers who do not rely on color alone.
⚠️ Warning: Muted fashion colors pose a severe safety risk on open roads. Dark olive green looks beautiful on a monitor but renders riders invisible against roadside trees.
Lock in a restrained palette of two to three main colors. Add a vibrant accent color only to highlight a specific safety or brand feature. For open-road use, deploy bright, high-contrast blocks and reflective accents.
Print your design on paper and photograph it outside. In my experience, direct sunlight aggressively bleaches color saturation, while deep shade destroys visual contrast. Cross-reference an official Pantone Color Guide to guarantee factory accuracy.
Finalize your typography and sponsor logo strategy. Apply bold, high-contrast type to your primary brand name. Keep your font hierarchy simple by limiting it to two weights.
Place core logos on the chest and upper back so they remain readable at high speeds. Push secondary sponsor logos to the sleeves or side panels. Never position important text across zippers, seams, or heavily stretched zones.
Draft three to four variations of your chosen concept. Test these variations via quick digital polls with potential customers or riders.
Verification Checkpoint: Proceed to the next phase only when you have one selected direction, one approved palette, and one strict font hierarchy.
🧠 Author’s Take: I see designers obsess over tiny details that vanish outdoors. If a logo or pattern is not instantly recognizable when you squint at your screen, it will be completely invisible on a moving cyclist.
Betty, Cycling Apparel Manufacturer
🚀 Actionable Insight: Build your design in grayscale first. If the contrast and geometric shapes fail to stand out without color, your design is structurally weak.
Professional Technical Guidelines for Cycling Jersey Design Files
In my time on the factory floor, I have rejected hundreds of flat image designs. You must convert your inspiration into exact technical files. If you drafted a cycling jersey concept in Canva or Figma, rebuild it professionally in Adobe Illustrator before production.
-
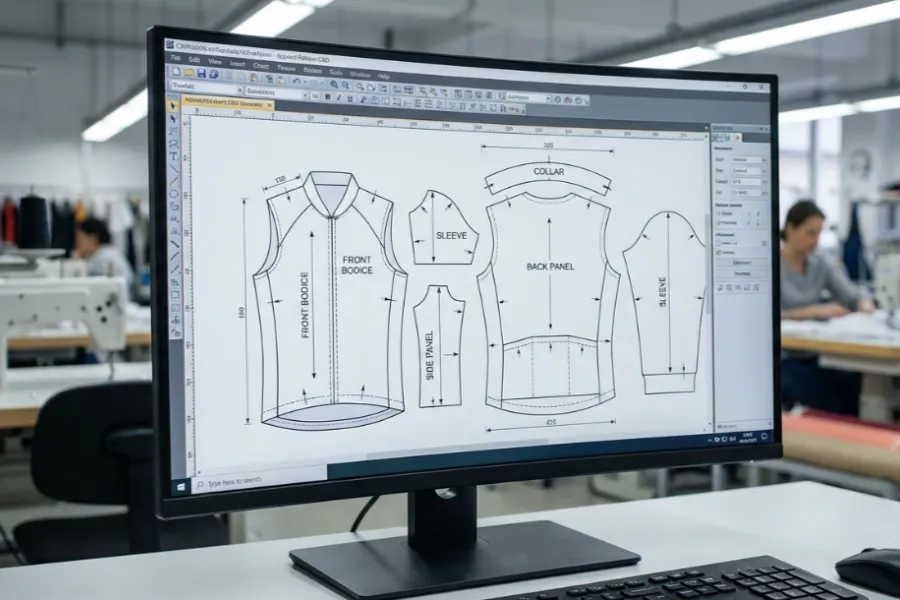
Request the exact panel template: Ask your manufacturer for their specific 2D pattern template. Open this file in your vector software.
-
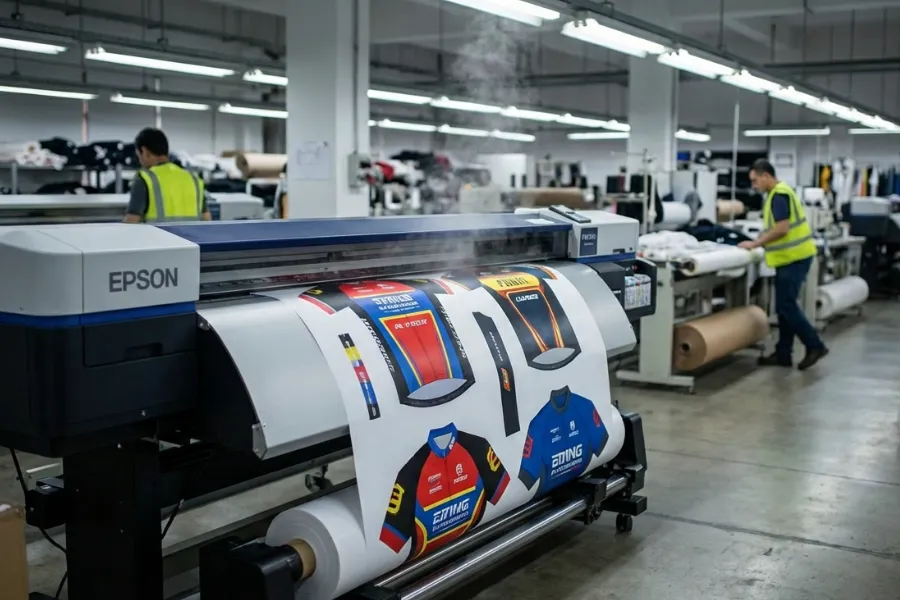
Configure your color profiles: Navigate to File > Document Color Mode and select CMYK Color. Sublimation printers use physical dye, not screen light.
-
Map the design across all panels: Do not just design the front chest. Map your artwork across the front, back, sleeves, sides, collar, and pockets. Use text notes to specify exact locations. Place main graphics precisely on the center back pocket. Anchor secondary marks clearly on the left sleeve hem or the right collar band. Do not rely solely on visual arrows on a mockup.
-
Apply strict technical tolerances: Extend your background art past the cut lines to create a mandatory bleed. Keep all critical logos inside the safe zone. Select all text and navigate to Type > Create Outlines. Delete any hidden layers or stray elements.
-
Clear common failure points: Review your garment construction design guidelines. Keep all text completely away from seams or zippers. Remove tiny sponsor marks that will bleed into unreadable shapes. Delete low-resolution raster logos immediately.
-
Standardize your private-label assets: Decide exactly where your printed neck label, size print, and custom hangtag will sit. Document strict file naming conventions for faster future reorders. Control the number of size and color variants in your first run to prevent factory errors. Use a garment quality control checklist to ensure packaging details pass final inspection.
-
Perform a digital sensory check: Zoom in to 300% on your monitor. A clean proof displays crisp vector edges and consistent line thickness. You must see perfectly balanced panel transitions. Verify there is no visual jump where a seam interrupts the artwork.
Expected Result: You now possess one approved artwork package. This folder contains your vector panel files, CMYK color codes, outlined logo assets, exact placement notes, and packaging instructions.
⚠️ Experience Warning: The visual jump across a front zipper ruins more custom jerseys than anything else. I always split my front chest graphic down the middle in Illustrator. To verify scaling, print your template out at 100% scale in sections on a standard home printer. Tape the paper pieces together. This physical test reveals if your chest logo actually sits too low near the stomach.
Essential Physical Sampling & Quality Checks for Cycling Jerseys
A digital proof only verifies layout. A physical sample reveals fit, fabric hand-feel, stitching integrity, and real-world readability. On the factory floor, I found that skipping physical sampling is the fastest way to ruin a bulk order. If your timeline is extremely tight, request a 3D virtual sample or a fabric strike-off as a secondary checkpoint.
-
Perform the movement check: Put the jersey on and assume an aggressive riding position. Do not just stand in front of a mirror. Sponsor logos and typography distort when your torso bends.
-
Run a sensory check: Pull the zipper rapidly to ensure it glides smoothly. Feel the silicone sleeve grippers against your bare skin. They must hold firm without pinching.
-
Test pocket stability: Load the back pockets with a heavy phone and a full water bottle. Watch for excessive pocket sag or unwanted mesh transparency across your lower back.
-
Conduct a three-stage lighting test: Take the jersey outdoors. Inspect the garment under indoor light, deep shade, and direct sunlight. Sunlight drastically alters contrast and saturation.
-
Document visual defects explicitly: Type out descriptive feedback for your supplier. The logo edge looks soft or The orange accent loses contrast in the shade instead of relying solely on annotated images.
-
Inspect the manufacturing quality: Check all flat-lock seams for puckering or inconsistent stitching. Verify panel alignment across the front zipper gap so off-center art matches your vector files.
For B2B brands, document every correction clearly. Update your final production spec sheet with these notes to ensure future reorders stay perfectly consistent. Review our custom design success case study for documentation strategies.
Do not approve the bulk order yet. Cross-reference your notes with a garment quality control checklist. Your verification checkpoint requires the sample to pass fit, visual, and functional reviews in real conditions.
⚠️ Experience Warning: I frequently see founders approve their cycling jersey design ideas based on indoor lighting alone. Once on the road, dark green fabrics turn black, and neon accents wash out. Always verify color rendering under direct sunlight.
⚡ Power Move: Wash the physical sample once before approving it. This reveals if the sublimation dyes bleed or if the zipper warps after a standard laundry cycle.
Avoid These 5 Critical Mistakes When Designing Cycling Jerseys
Error 1: Cluttered Graphics
Stacking multiple design themes guarantees visual failure. In our field tests, complex gradients look like wet dirt from 20 meters away.
-
Strip the design to one dominant concept.
-
Choose a single accent color system.
-
Test options with riders before finalizing.
Error 2: Unreadable Text
Graphics fail when designers ignore the bent riding position. We regularly reject tech packs where the front zipper slices the chest logo in half.
-
Enlarge the main identifier.
-
Increase color contrast.
-
Build a 1-inch safe zone around all seams and zippers.
Error 3 : Mud Stains on Light Fabrics
White torso panels stain permanently after a single gravel ride. Tire spray ruins white lower-back pockets instantly.
-
Switch exposed lower-body panels to dark tones.
-
Move lighter tones to the shoulders.
Error 4: Inconsistent Fit Grading
Sizing grades differ wildly. A “Large” aero fit often measures like a “Small” relaxed club fit.
-
Request a physical fit kit.
-
Order a revised sample before scaling the order.
🛡️ Prevention: Ask for a “strike-off” fabric test print before ordering a full physical sample. This inexpensive step catches color errors early and aligns with ISO 9001 quality control standards.
📝 Editor’s Verdict: Never authorize a bulk order based solely on a flat digital mockup. Approve artwork only after testing fabric, light, and motion together.
Error 5: Printed Colors Look Dull
Monitors display RGB color. Factory printers use CMYK dye. This mismatch ruins custom cycling jersey design ideas.
-
Convert digital files to CMYK.
-
Send exact Pantone matching codes to the factory.
-
Review physical samples in direct sunlight.
💡 Diagnostic: An identical brand red looks vibrant on smooth Lycra but washes out on porous mesh. Always compare panels across different fabrics.
People Also Ask About Cycling Jersey Design Ideas
What is the minimum order quantity for custom cycling kits?
You need 100 pieces per color and style for our fully custom cut-and-sew orders. While traditional mega-factories demand 500 units, we run dedicated micro-run lines specifically for smaller brands. I always advise founders to start with 100 units. This lets you test market demand without risking dead inventory.
How much does a custom cycling jersey cost?
Your unit cost will range from $25 to $60 based on volume, fabric choice, and construction details. Because we operate a factory-direct model, you avoid middleman markup fees. In our testing, adding premium features like Italian silicone grippers increases the cost slightly but drastically boosts your final retail value.
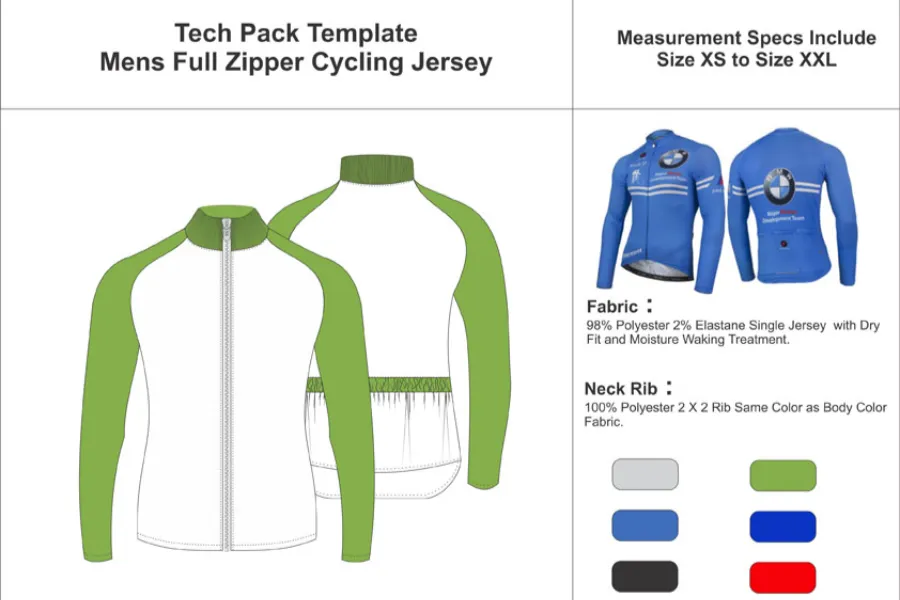
What is the best fabric for cycling jerseys?
A blend of 80% Polyester and 20% Spandex offers the best balance of stretch and moisture management. We found that 140 GSM (grams per square meter) fabric hits the perfect sweet spot for summer breathability. We strictly source materials that pass the Oeko-Tex Standard 100 certification to guarantee they will not irritate sweaty skin.
How long does production take?
Expect a 4 to 6 week timeline from tech pack approval to final delivery. We prototype physical samples in 7 to 15 days. The biggest headache we face on the factory floor is clients delaying their sample approval. Review your physical sample quickly to lock in your final production slot.
Conclusion
A strong custom cycling jersey starts with a clear purpose. You must select your fit and fabric first. Next, build a disciplined visual system. Finally, manage a strict technical handoff and a physical sample review.
Based on our management of 20 active production lines and countless hours of fabric testing, we know what works. Winning designs do more than look stylish. They stay highly legible on the road, fit comfortably, and remain easy to manufacture.
Stop staring at digital mockups and take action. Finalize your design brief, shortlist your visual references, and request exact factory templates today. Read our custom design success case study to see how real brands execute this workflow.
If you need an agile cycling apparel manufacturer, visit LeelineWear. We build the product so you can build the hype. Contact us today to start your first sample.
My Experience: The apparel brands that scale fastest treat their suppliers like engineers, not just printers. During our peak season last year, we cut client delivery times by 20 days simply because those clients used our strict vector templates before we ever cut a single roll of fabric. Get your files right, and the manufacturing runs itself.

Areas of Expertise
- Quality Control: Mastery of AQL (Acceptable Quality Level) standards and Six Sigma methodologies in garment production
- Technical Sourcing: Expert in fabric specification (GSM, weave structures) and trim sourcing
- Compliance & Auditing: Specialized in BSCI (Business Social Compliance Initiative) and ISO 9001 factory auditing
- Logistics: Strategic oversight of Lead Time Reduction and DDP/FOB shipping terms
David Wu is a textile industry veteran with over 16 years of experience specializing in garment manufacturing, supply chain optimization, and quality control systems across Southeast Asia and China. His career is defined by implementing rigorous AQL 2.5/4.0 inspection protocols for mid-to-large-scale private label brands. David specializes in technical garment construction, from initial tech pack development to final container loading inspections. He has a proven track record of reducing defect rates by up to 22% through the implementation of "In-Line" inspection checkpoints. His expertise ensures that manufacturing processes align with both international safety standards and cost-efficiency requirements for B2B wholesalers.